

Hello, fellow songwriter!
Thanks for reading René Moffatt Music! Subscribe for free to receive new posts and support my work.
I’m going to keep this simple. My objective is to show you one practical way to make more tips from your gigs.
We all play our fair share of paid gigs at restaurants, breweries, wineries, and bars. It’s hard work, but there are a few good reasons to do it:
1. Earn money. Once you’ve built a good hour or so of music, you are employable. Go provide the service of music to people and venues that want to pay you for it.
2. Hone your craft. Maybe you’re new and using paid gigs to cut your teeth. Maybe you’re a veteran songwriter refining songs you’re workshopping. Either way, paid gigs let you get paid to practice.
3. Play because you love it. Paid gigs are a way to take your love of playing music from hobby status to semi-pro and beyond.
Paid gigs are part of the game and part of the music business. You should always get paid unless you have a very good reason for playing for free. That’s a topic for another post.
Even when you are getting paid, you’re probably still going to put out a tip jar so the audience has a way to say, “Thanks for the music.” Some nights the tips are great. Other nights, not so much.
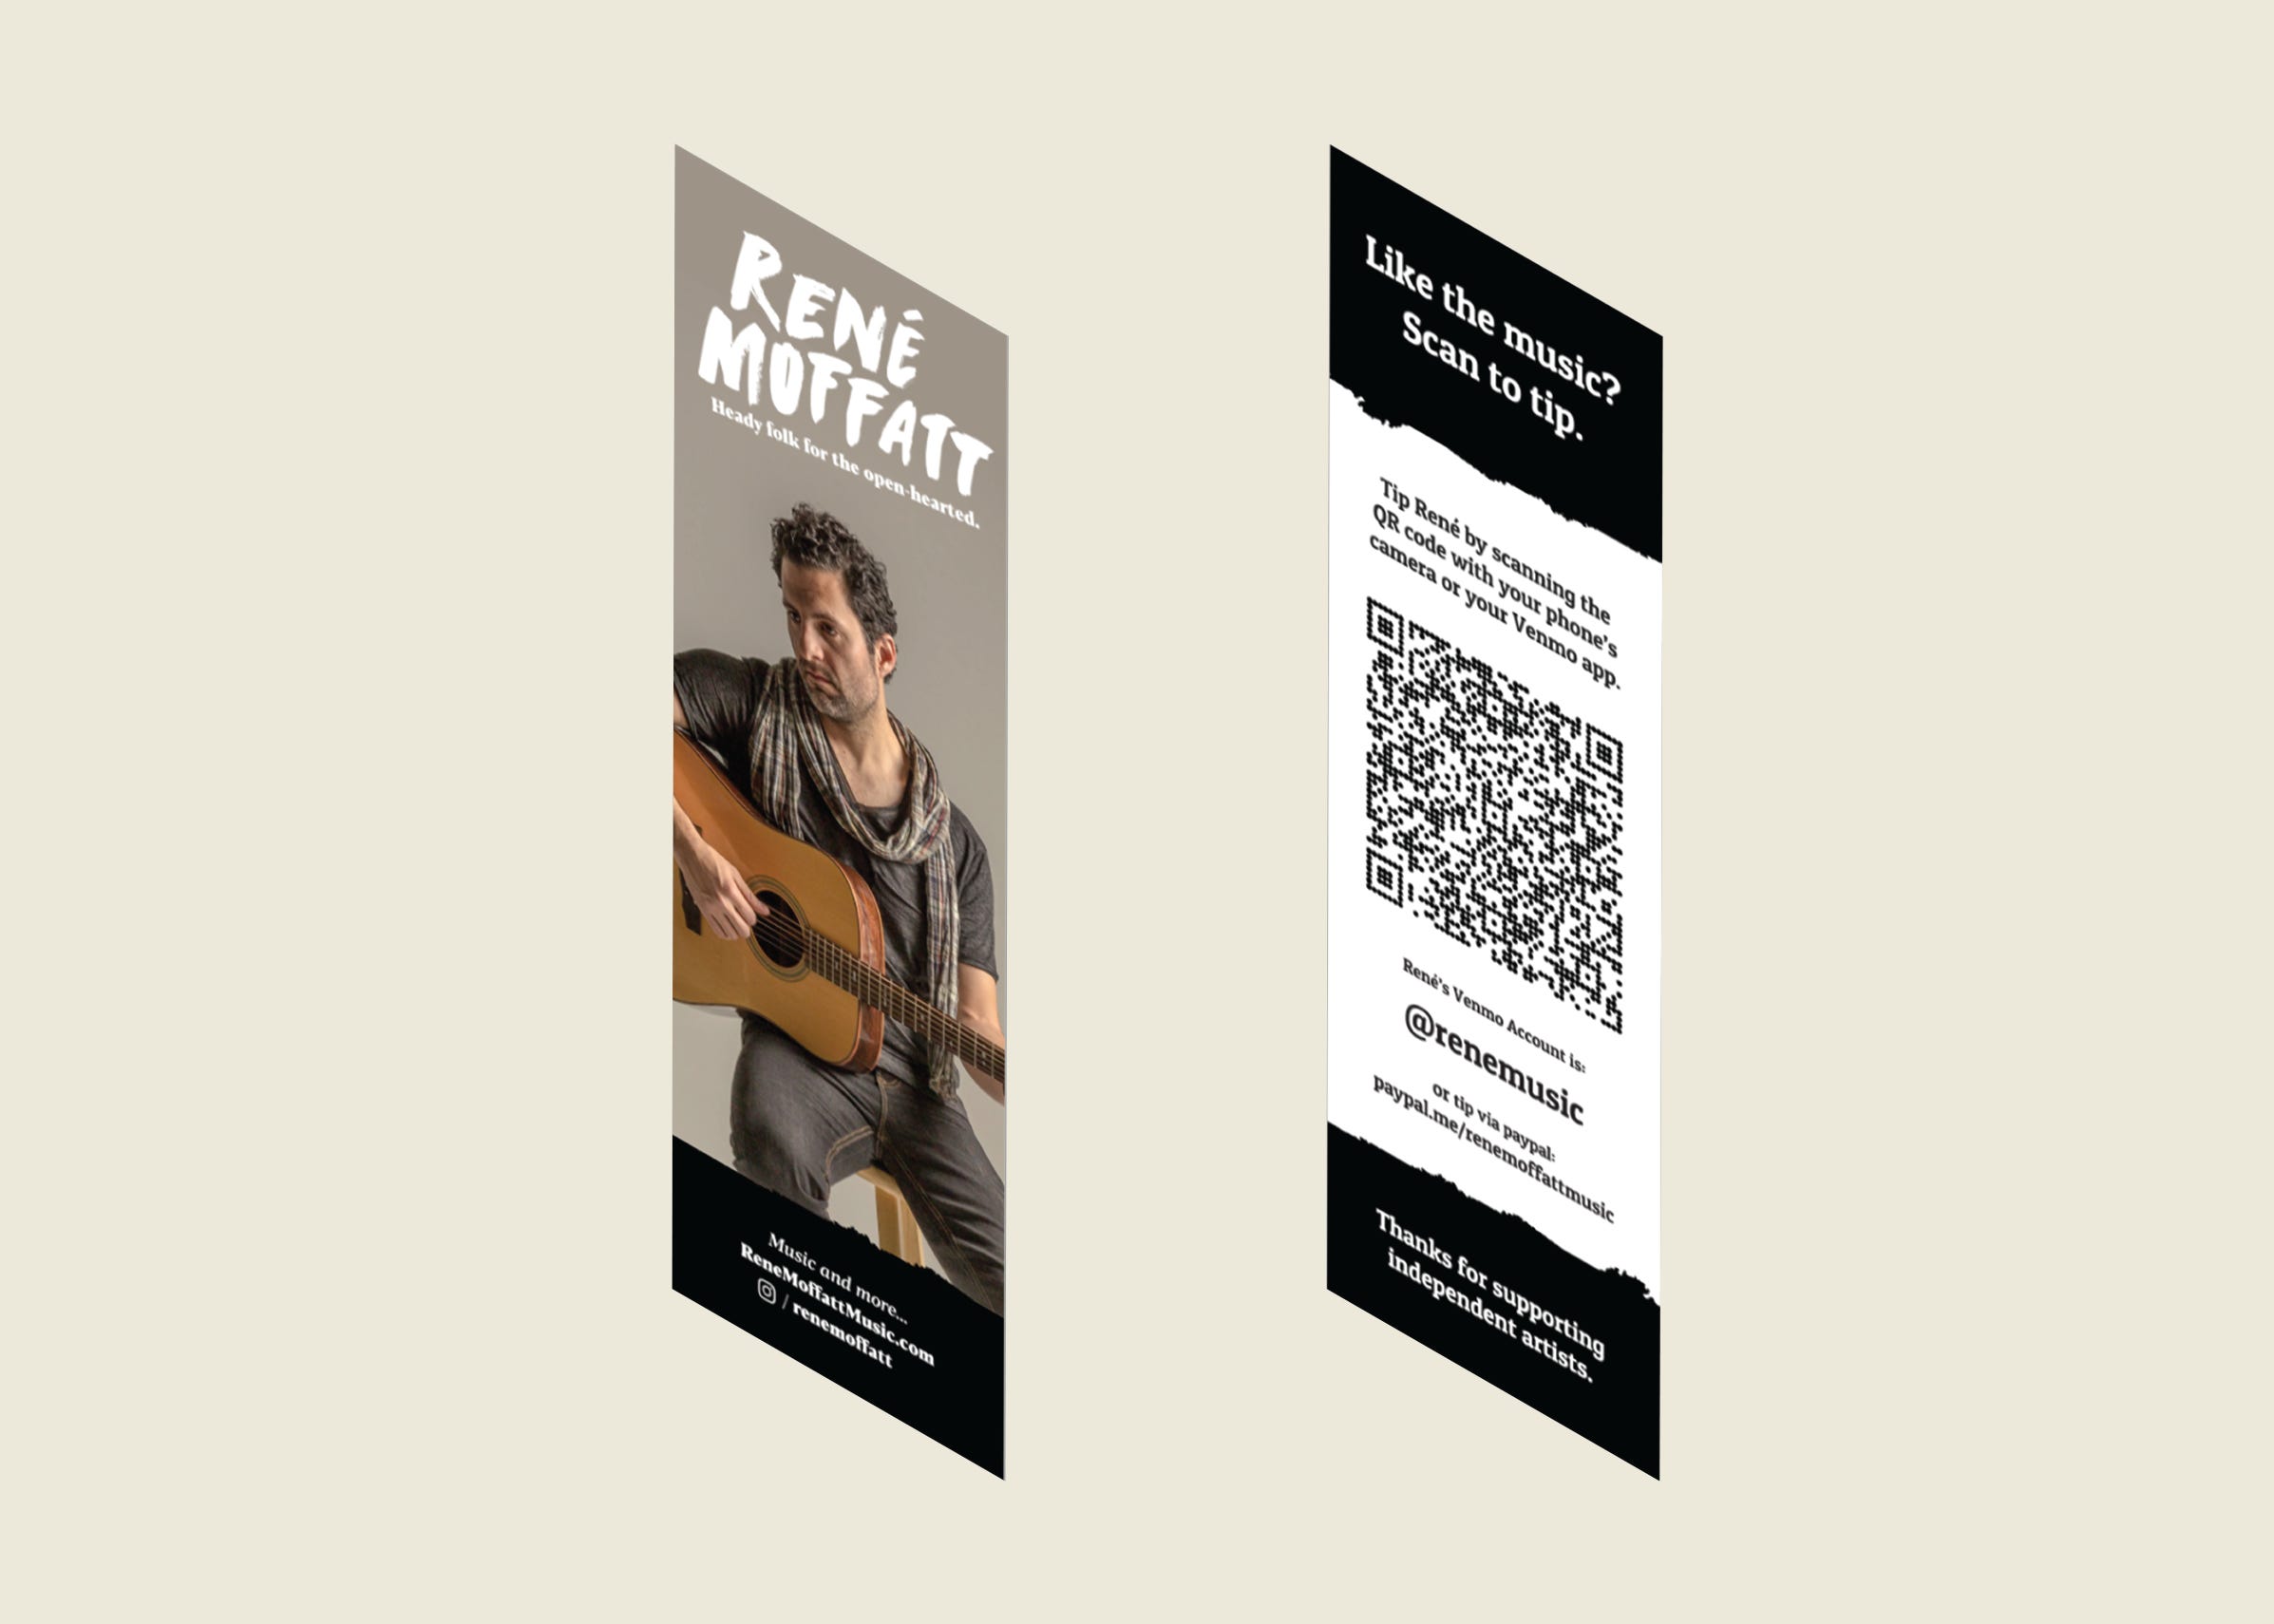
I’ve found a way to increase my tips at gigs, and I want to share it with you: bookmarks with a QR code that links directly to your Venmo account.
The Tip Bookmark
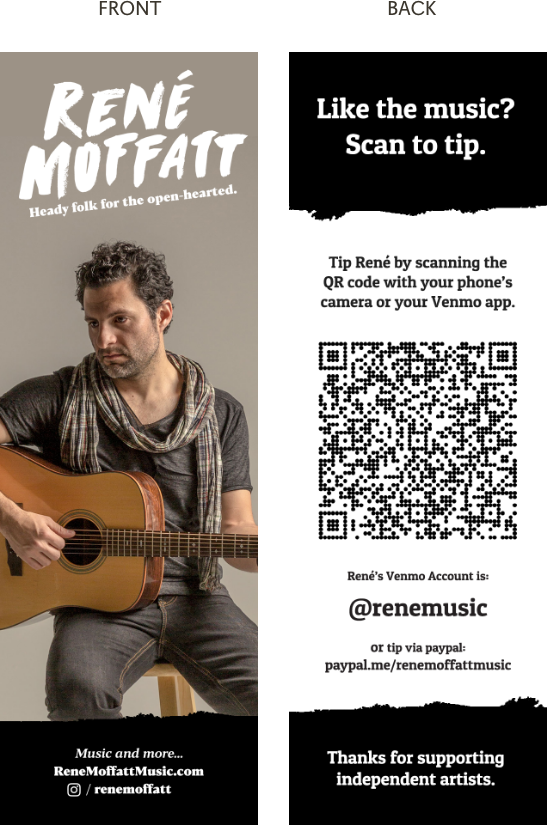
I gig one or two times a week, and over the course of a year I made a little more than $2,000 in tips through these bookmarks alone. I consistently made about 20–25% more than the guarantee each night when I used them.
That may not seem like a lot, but it adds up to at least one extra gig per month, if not two. Those tips could help fund a single or buy a piece of equipment. Margins in the music business are slim, so why leave tips on the table?
Why A Bookmark Works
1. More people see your QR code. I see a lot of artists put one large QR code or their Venmo handle near the stage or merch table. If your code is visible in only one spot, you reduce the chance that patrons will see it, scan it, and tip. When bookmarks are placed at the bar and on tables, your music and tip link are directly in front of patrons. They don’t have to get up. That matters because people often intend to tip as they leave, then get distracted paying the bill, talking with friends, or making a stop at the restroom.
2. The bookmark helps people find you later. Include your website and one or two social handles so people can read about you, follow you, or join your mailing list. The bookmark does some introductory work while you serenade them.
3. A bookmark stands out. It isn’t a business card or a flyer. Business cards scattered around a venue can look like somebody walked in from the street and canvassed the place. Flyers can feel disposable. A 2-by-6-inch bookmark gives you more space than a standard business card and, when printed on light cardstock, feels like a premium leave-behind. Patrons have told me they took mine home and used it as an actual bookmark. It also holds up: at the end of the night, I gather the remaining bookmarks and use them again at my next gig.
Three Ways To Make Your Bookmarks
Method 1: Design it from scratch
If you have some design experience with Photoshop, Photoshop Express, Canva, or similar software, download a bookmark template from a reputable printer, create the design, upload the finished artwork, and place your order.
VistaPrint: https://www.vistaprint.com/marketing-materials/bookmarks
PrintPlace: https://www.printplace.com/bookmark-printing
NextDayFlyers: https://www.nextdayflyers.com/bookmark-printing/
Method 2: Use the UPrinting design tool
UPrinting lets you design a bookmark on its website and send that design directly to print. That removes a production step and is especially useful for musicians who don’t have much design or file-handling experience. The walkthrough below focuses on this method because it will be the easiest option for many people.
Method 3: Hire a designer
If you already work with a graphic designer for your merch, collateral, or promotional graphics, send them this idea. It should be a fairly quick project. I also provide this service to musicians. You can email me at renemoffattmusic@gmail.com.
I’m going to focus on “Method 2: Use the UPrinting design tool” because it’s likely the easiest for a DIY musician to utlize.
What You’ll Need
A UPrinting account
An account lets you check current orders, review past orders, view saved quotes, and return to saved designs. Signing up with an email address will make the process easier.
A Venmo account
I used to have a personal Venmo account, but it asked users to enter the last four digits of my phone number. I saw that as a barrier to quick tipping, so I opted for a business account.
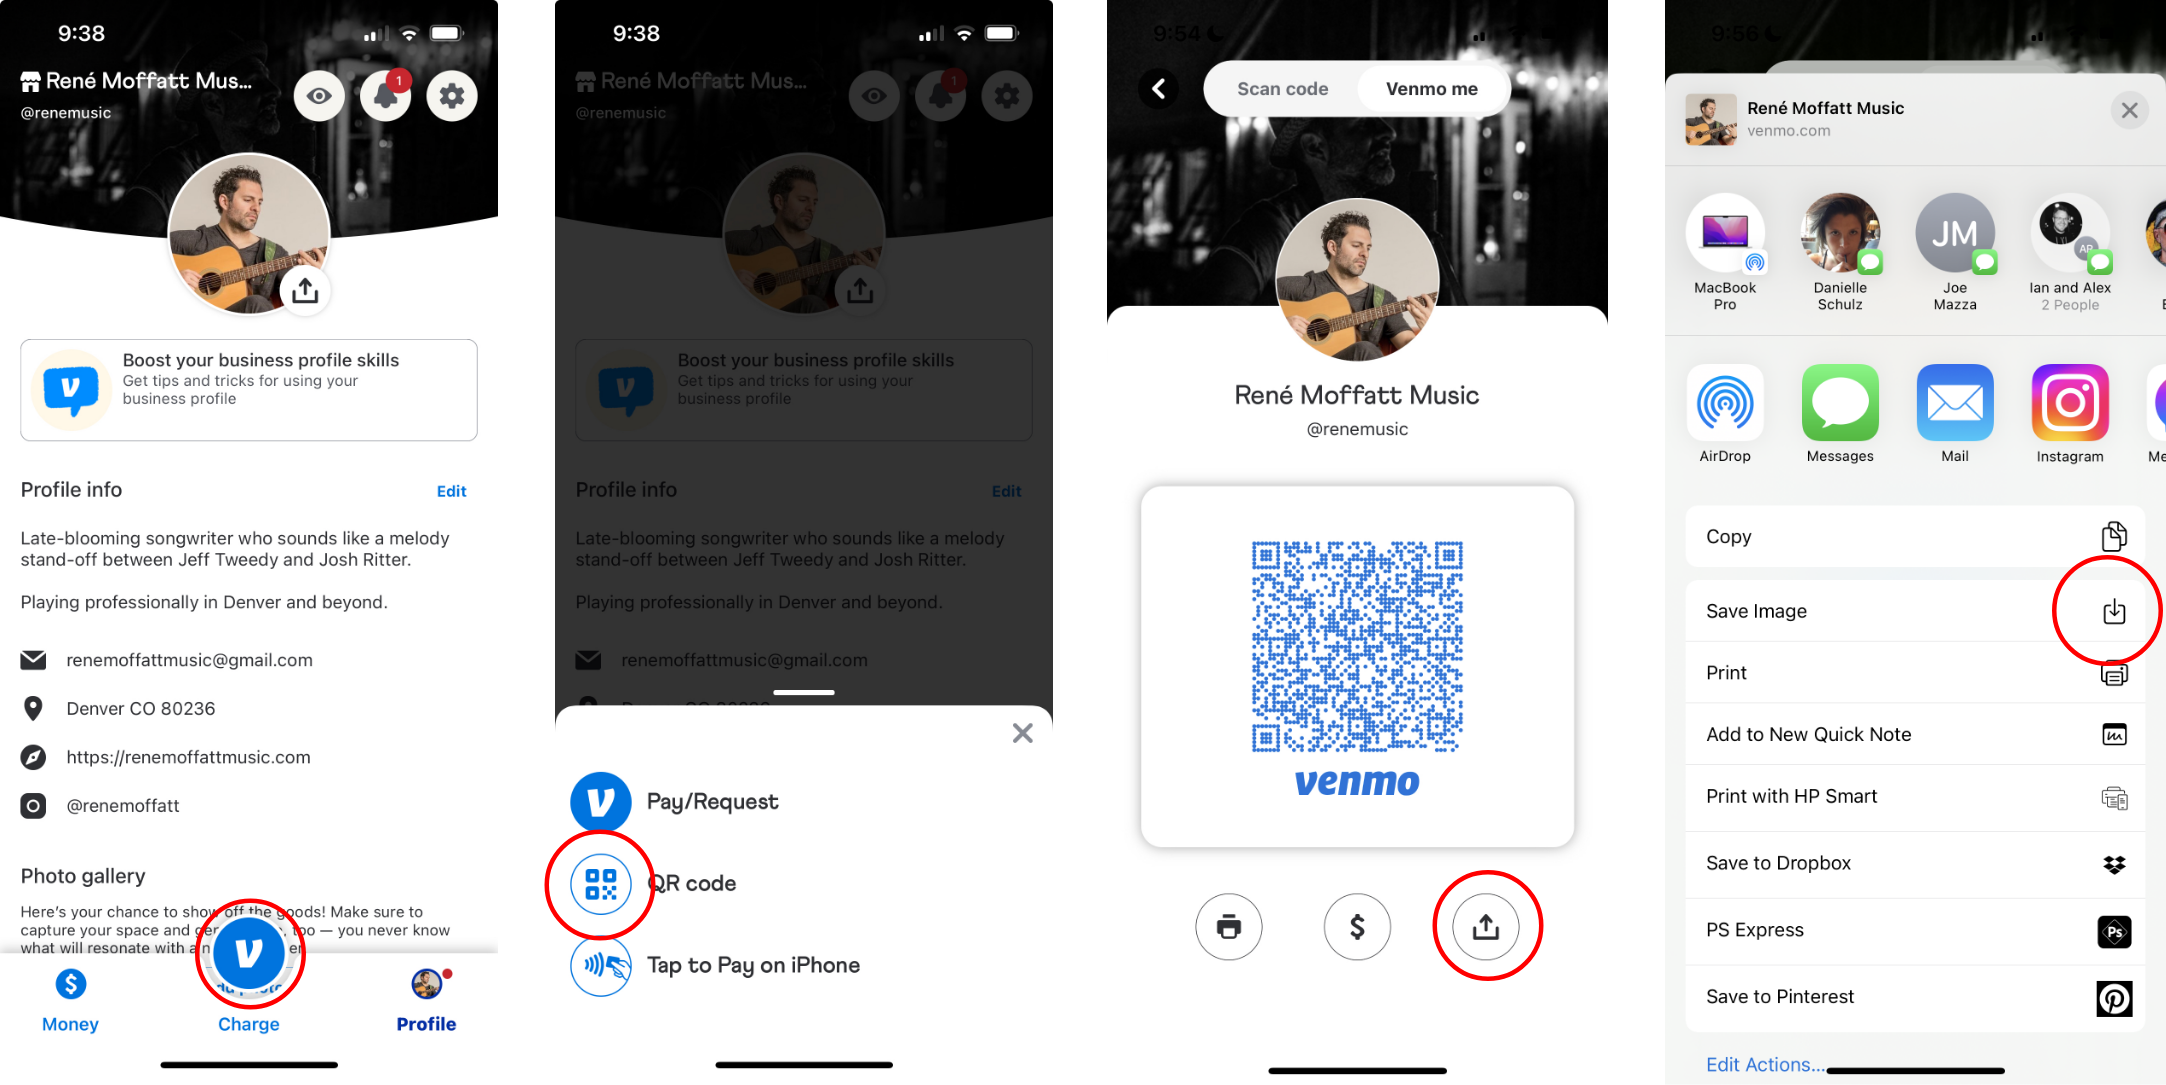
Your Venmo QR code image
You can find your QR code on the Home screen in the Venmo app. Email yourself the PDF or image file instead of relying on a screenshot; the exported file should give you better image quality for printing. The screens below show the basic retrieval process.
Your band or artist logo
A logo isn’t absolutely necessary, but an identity for your band or solo project can help you look more established. A transparent PNG is best. A large JPG can work if the image has enough resolution to print cleanly.
An artist photo
Use a professional photo that shows you with your instrument or playing live. It helps patrons put a face to your name. A JPG is common; use the highest-resolution version available.
A few additional details
Your website address, such as JohnSmithMusic.com
One or two preferred social handles, such as Instagram or TikTok
Your PayPal address, if you want to offer an optional alternative tipping method
How To Build The Bookmark In UPrinting
The UPrinting interface may change over time, but the basic sequence should remain similar: choose the product and print specifications, open the online designer, upload your assets, design the front and back, preview the piece, save it, and order.
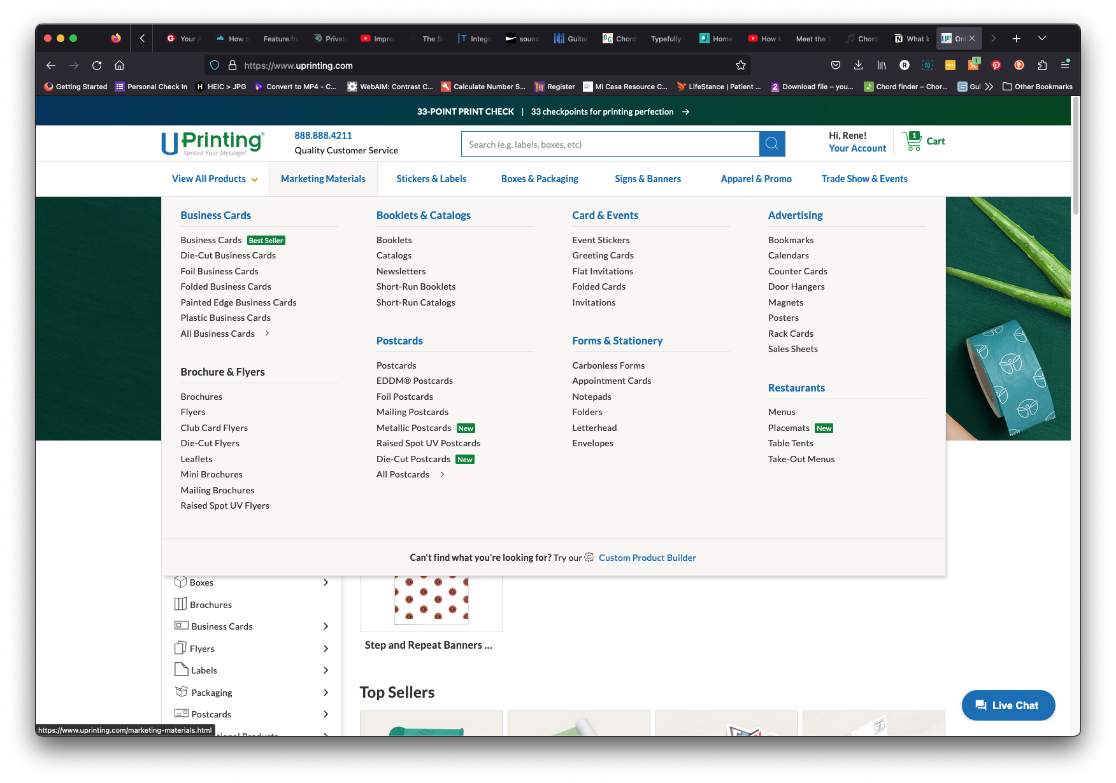
1. Find the bookmark product
Log in to UPrinting.com and navigate to Marketing Materials, then Bookmarks.
2. Choose the print specifications
You can choose from several options. Here is my recommendation:
Option / My Recommendation
Size / 2 by 6 inches, the most common bookmark size
Paper / 14 pt uncoated cardstock; it is sturdy, and I prefer it to glossy stock
Printed sides / Front and back
Corners / Your choice; I prefer sharp corners
Hole drilling / No
Bundling / None
Quantity / Your choice; ordering more reduces the cost per bookmark
Printing Time / Your choice
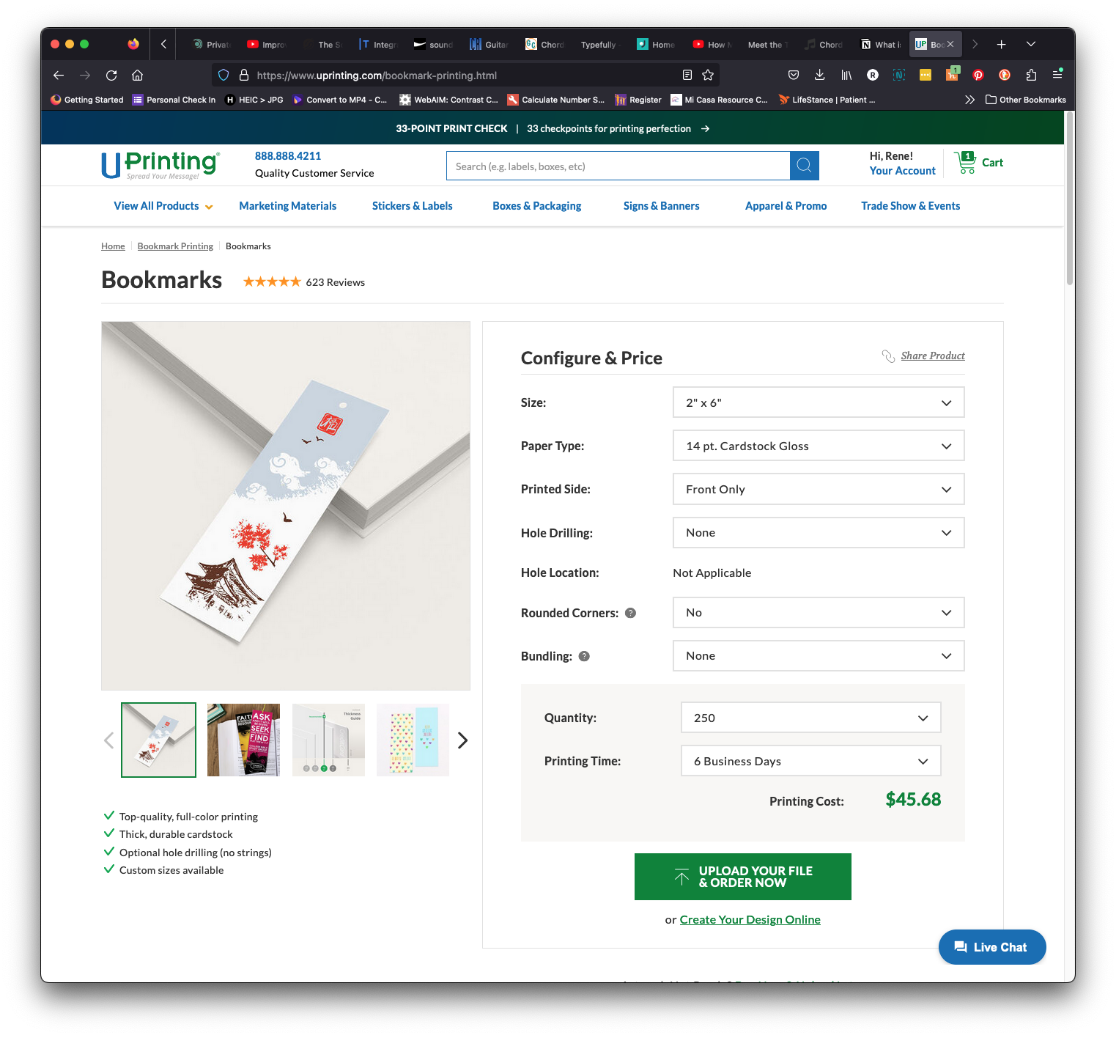
Once you’ve made your selections, click “Create Your Own Design Online.”
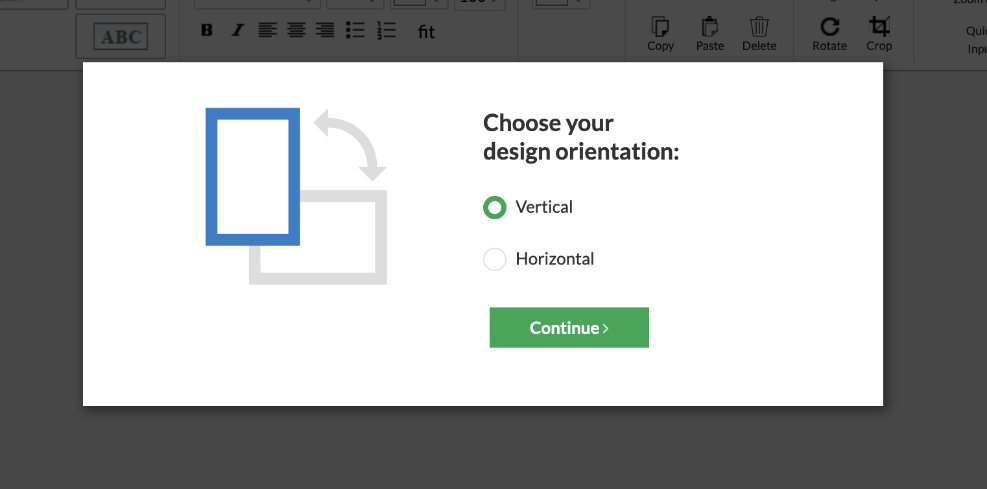
3. Choose the orientation
Choose a vertical or horizontal design. Either can work, but I prefer vertical.
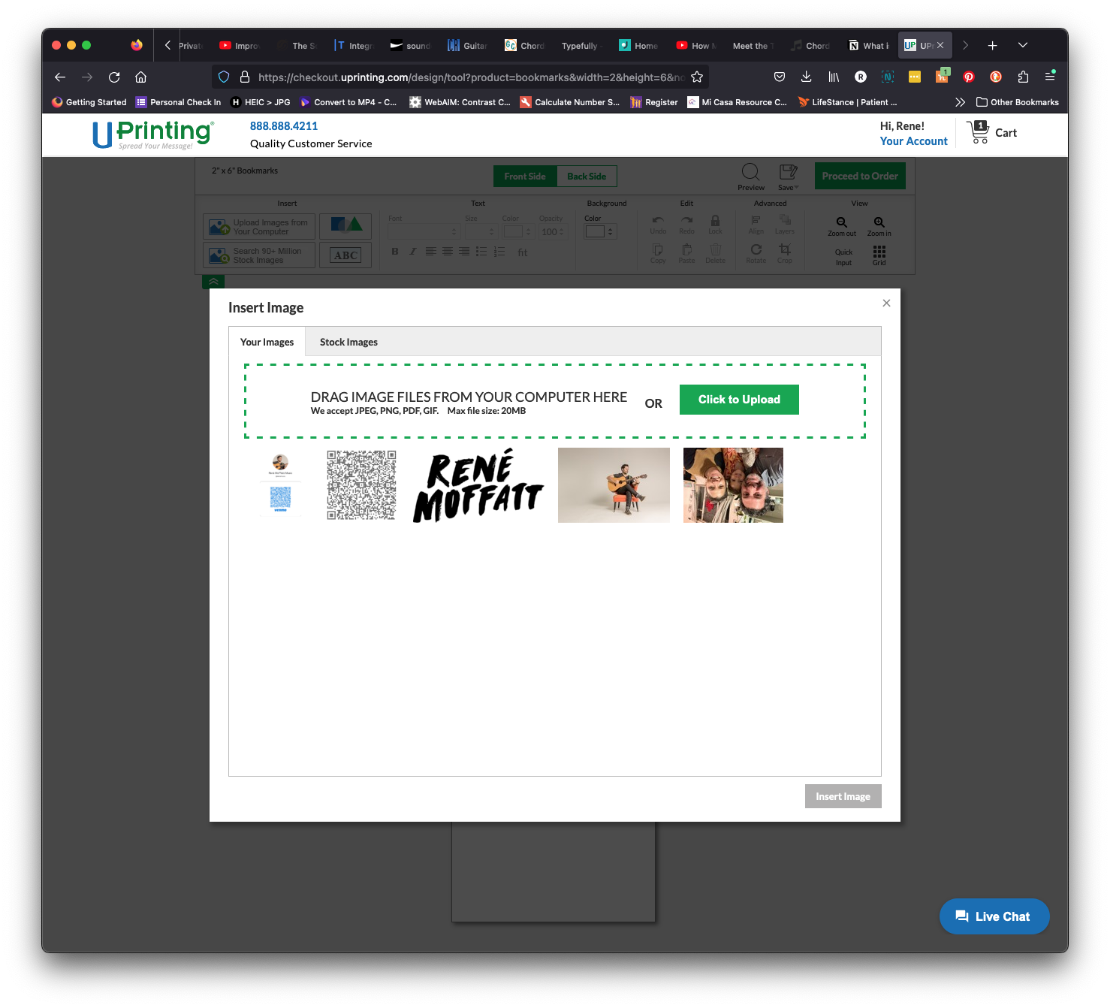
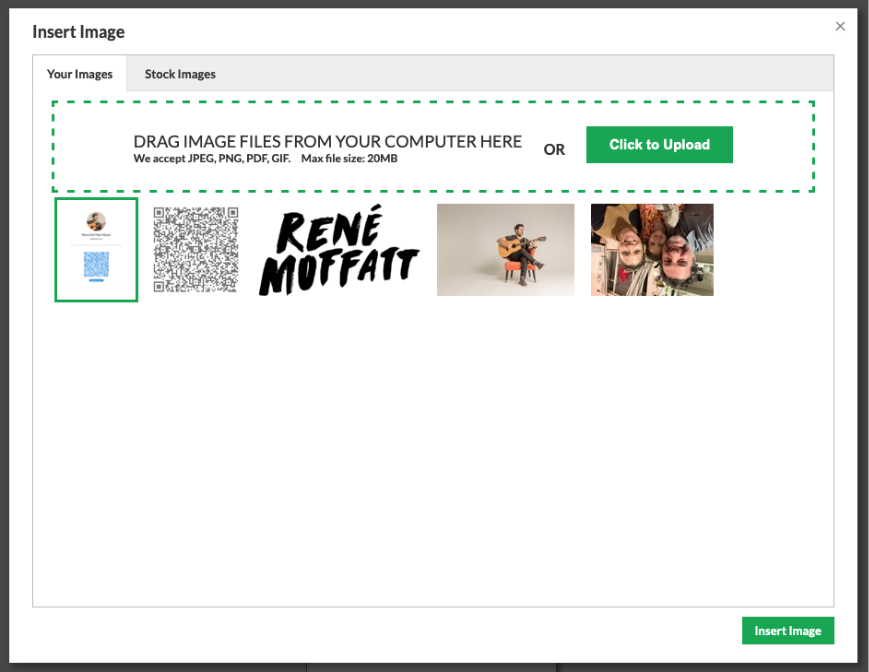
4. Upload your assets
The design editor is where the fun begins. Click the image-upload control and add the assets you gathered earlier:
Your Venmo QR code image or PDF
Your band or artist logo
Your artist photo
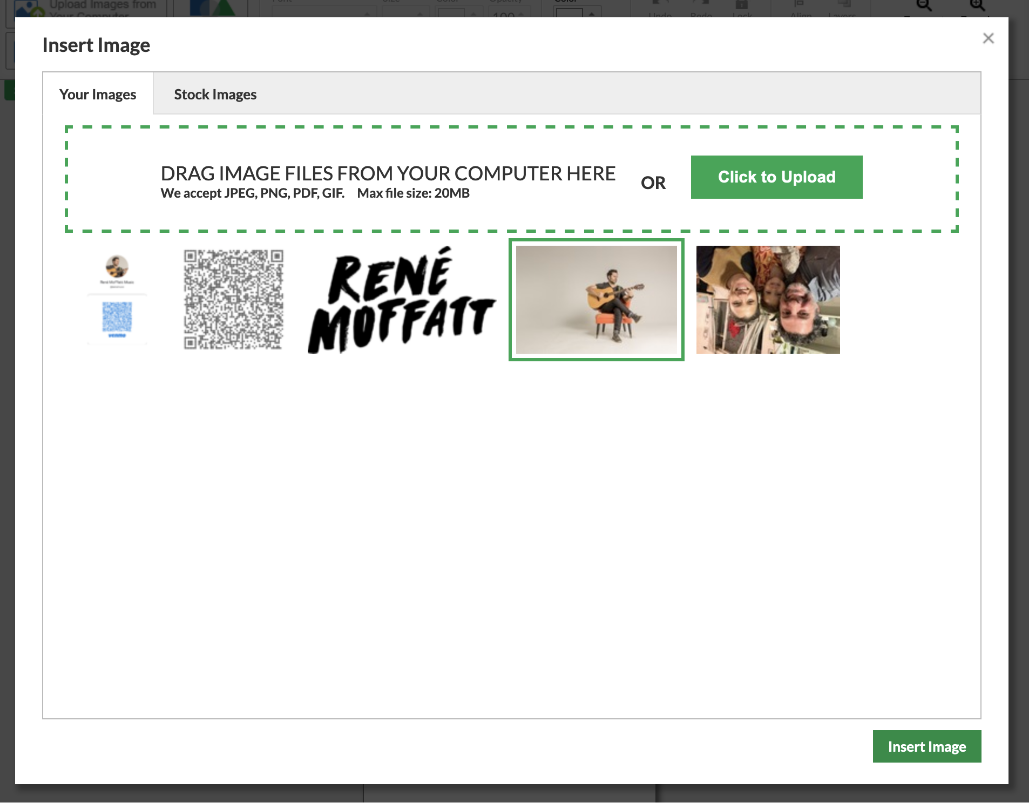
5. Design the front
Select your artist photo and insert it onto the canvas. Resize and reposition it until it fills the bookmark in a useful way. You can scale and move any of your uploaded assets.
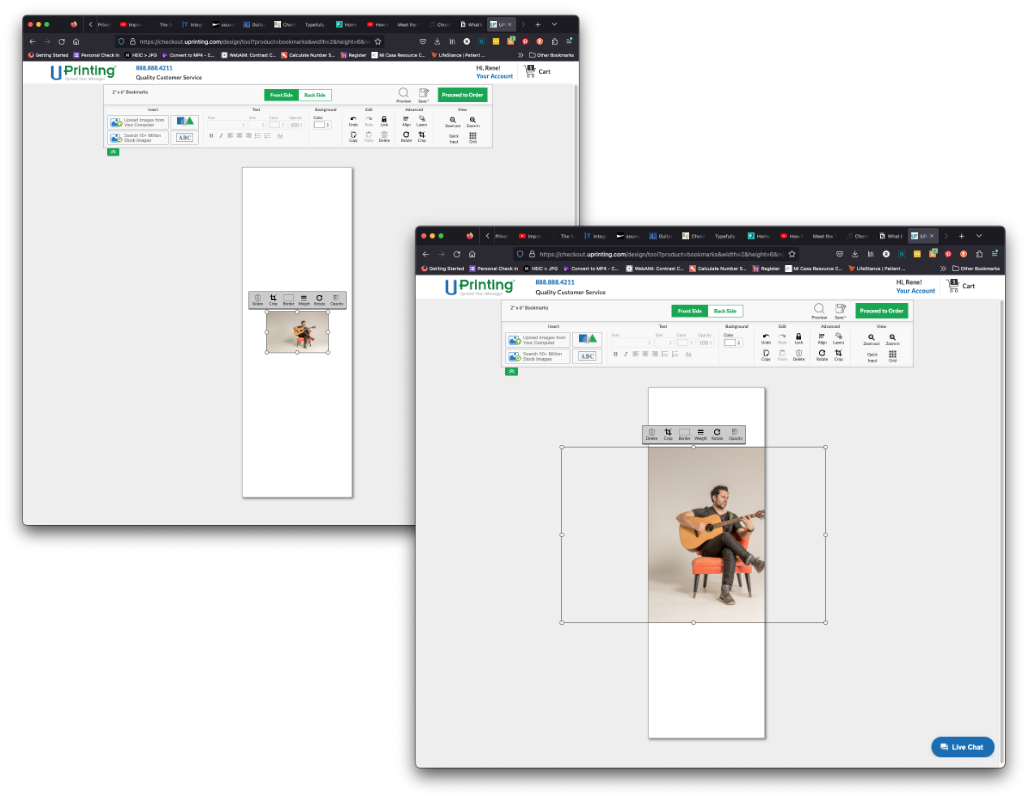
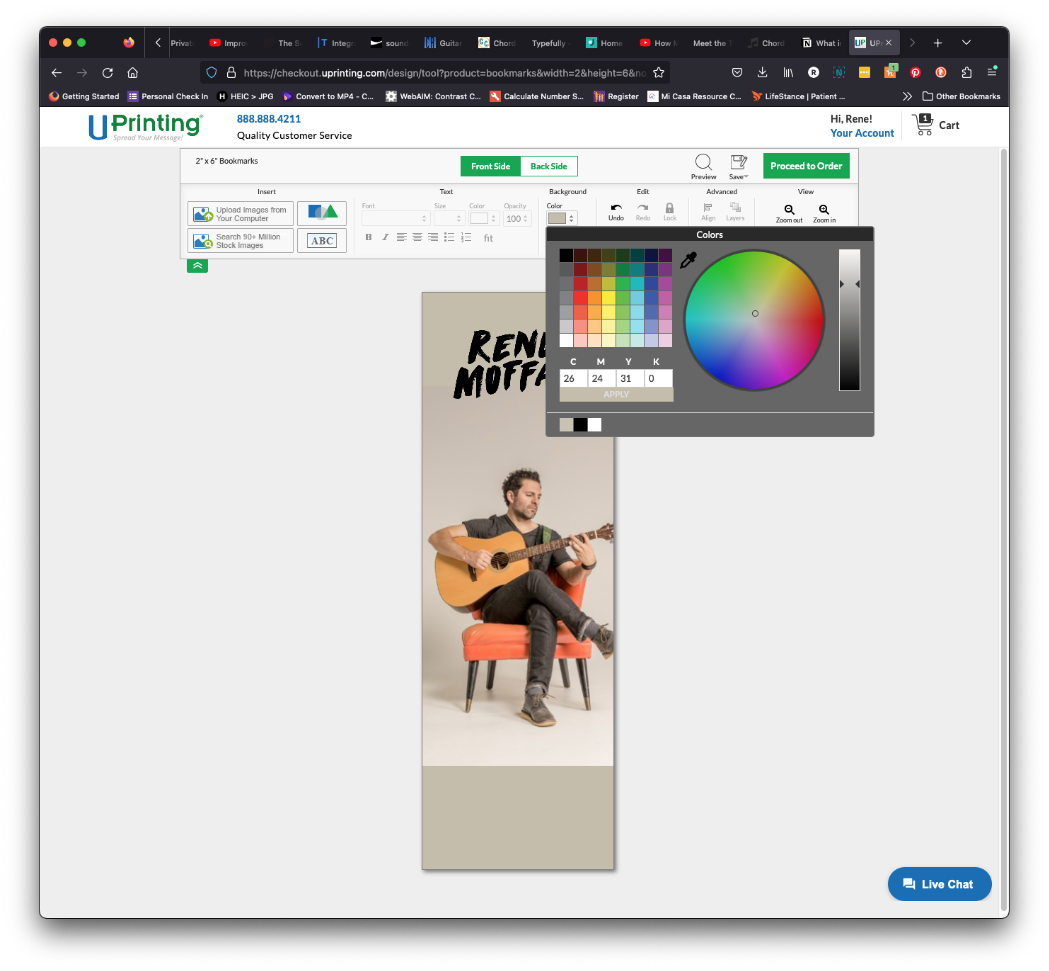
Add your logo. If you want, change the background color so it supports your photo and identity.
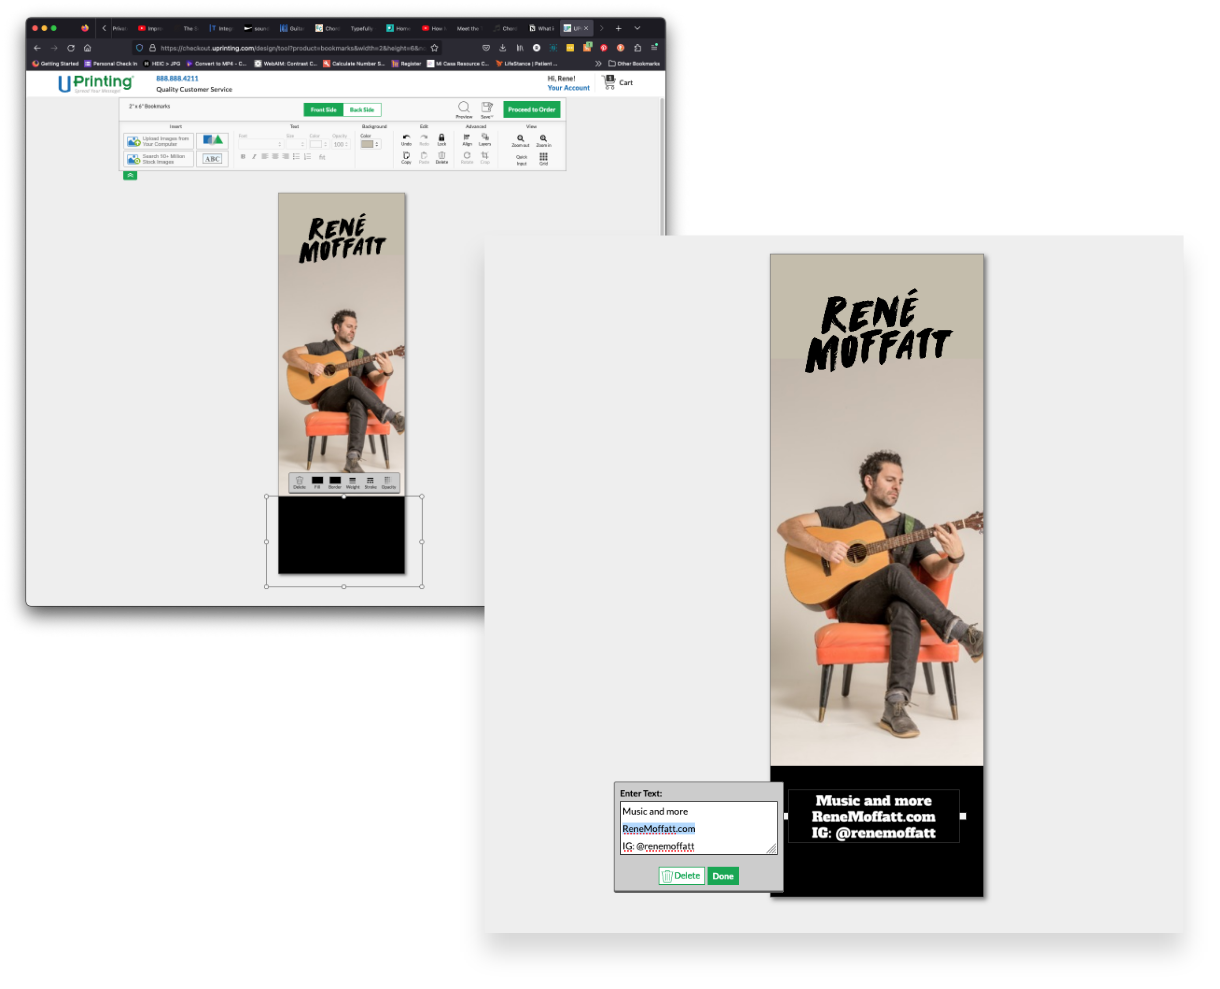
Add a dark rectangle near the bottom to create a readable background for your text, then add your website and social information.
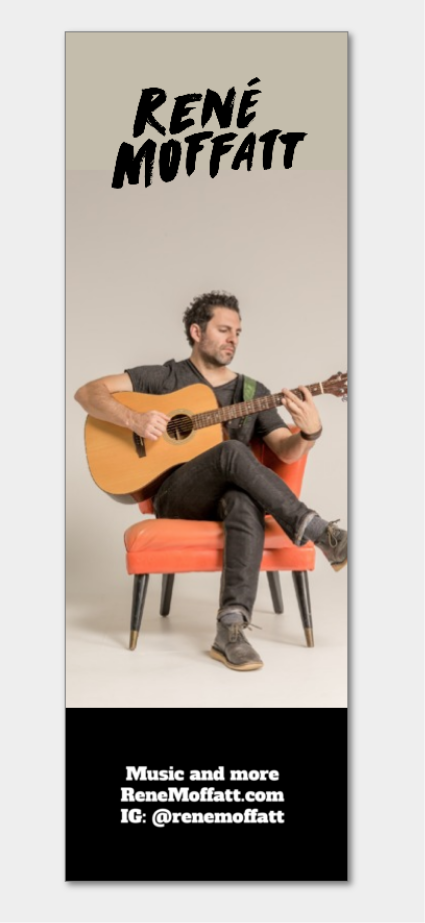
Congrats—you’re halfway home. At this point, the front of your bookmark is designed. Now it’s time to create the back.
6. Design the back
Click the “Back Side” control to flip to the blank reverse side of the bookmark.
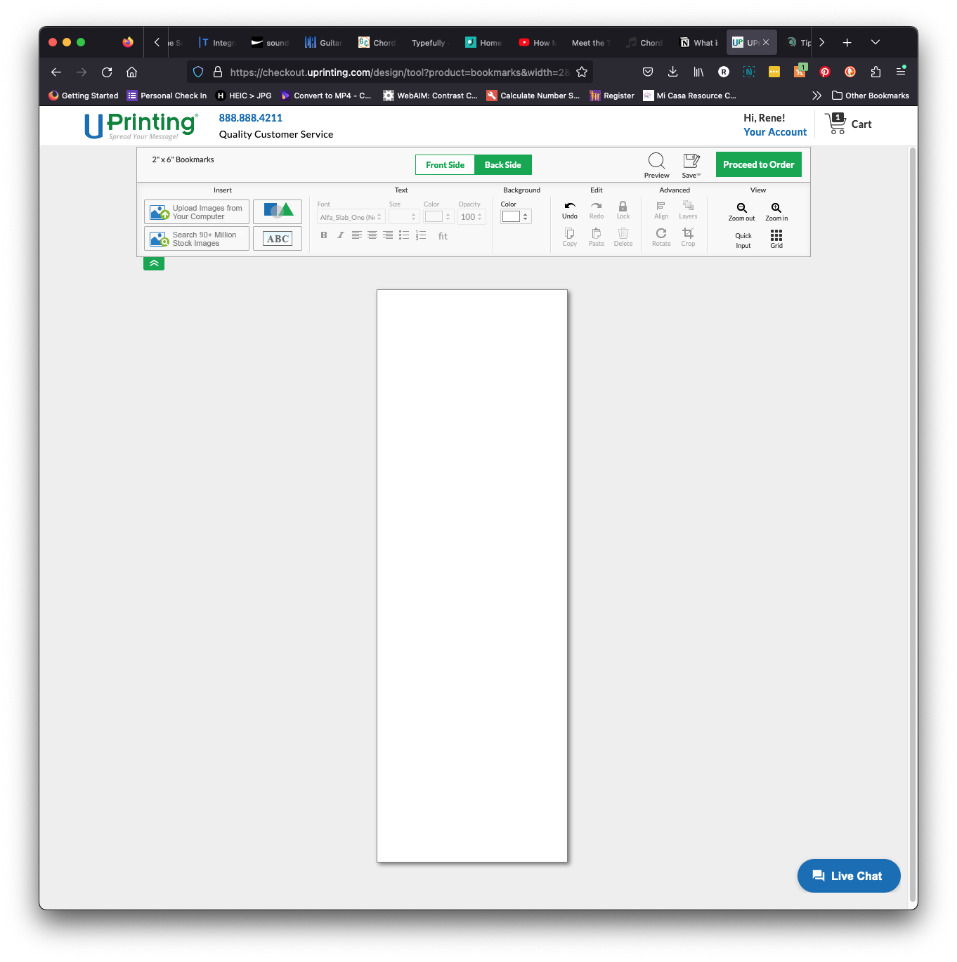
Open the image uploader again and choose your QR code.
Insert the QR code, then drag the corners to make it larger and position it near the center of the bookmark.
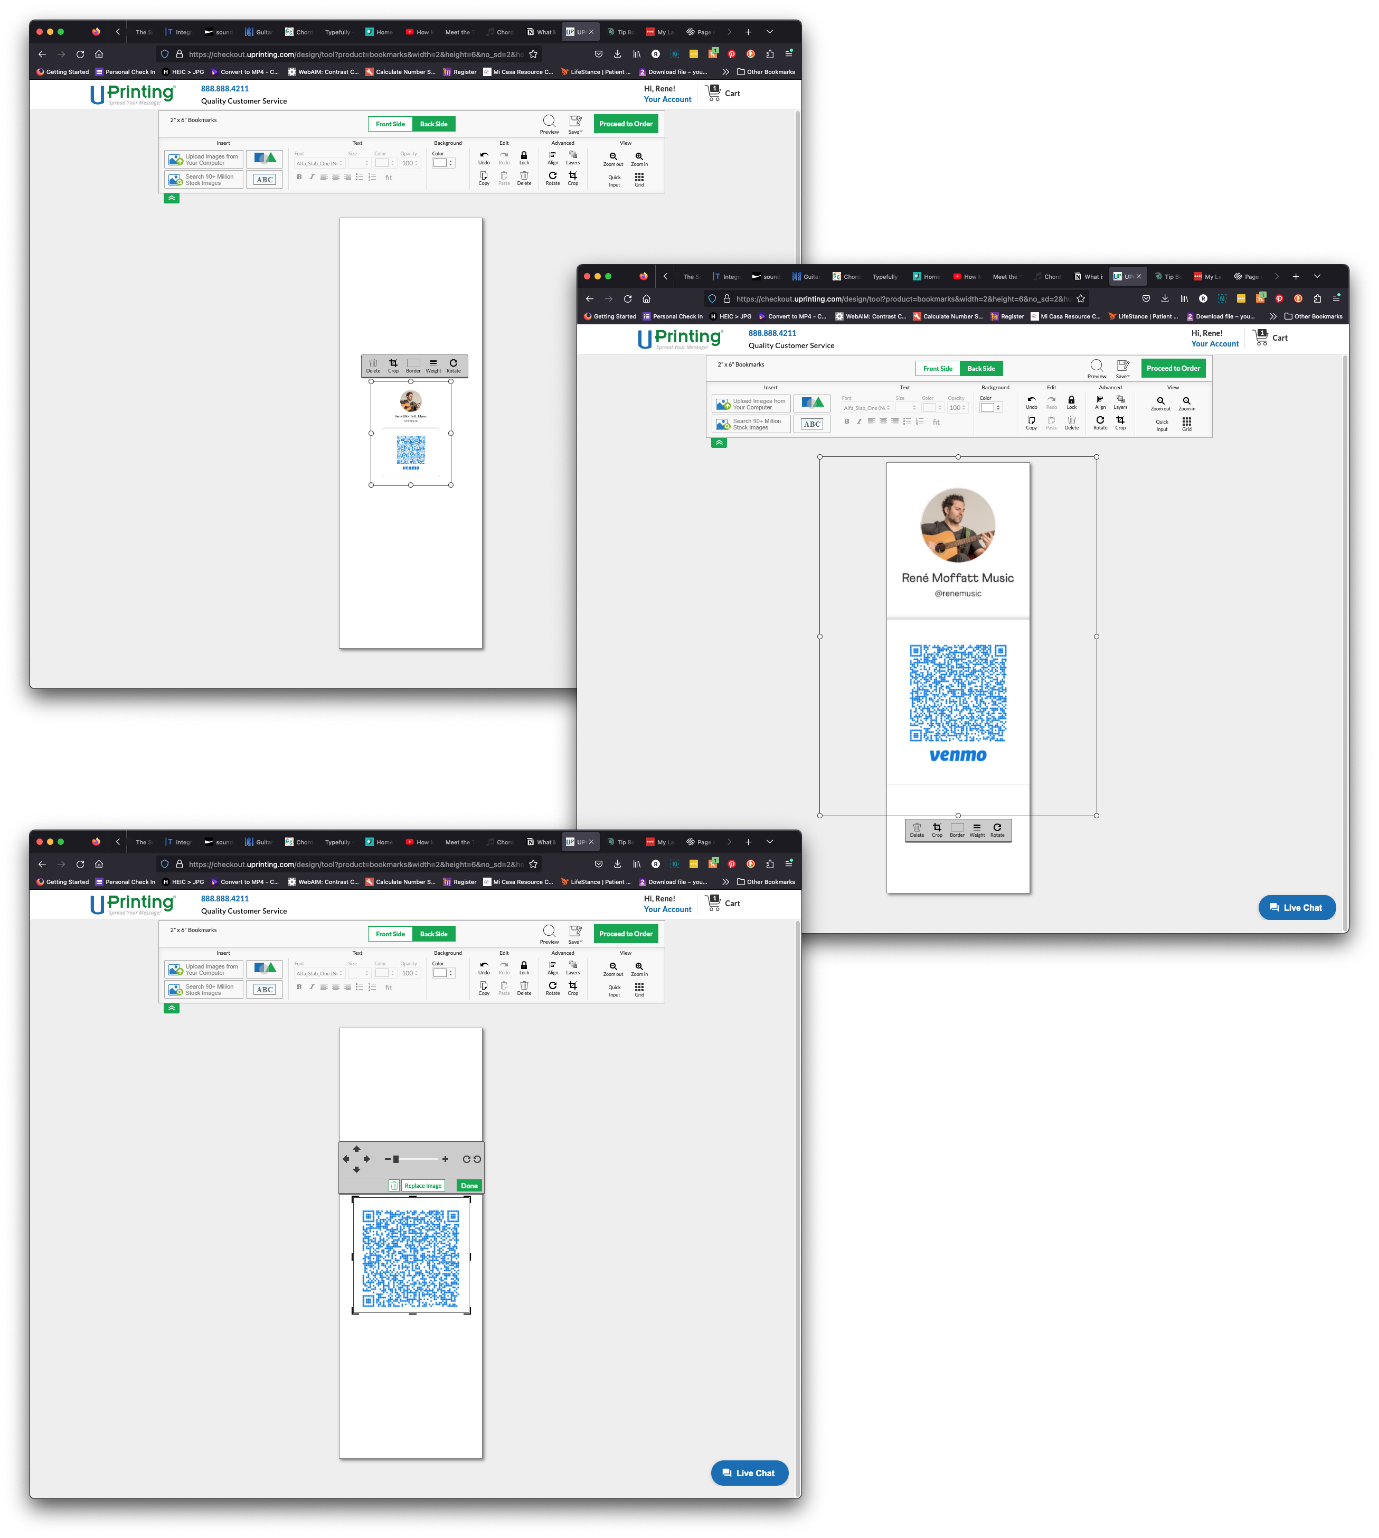
Use the crop tool so only the QR code portion of the Venmo image or PDF is visible.
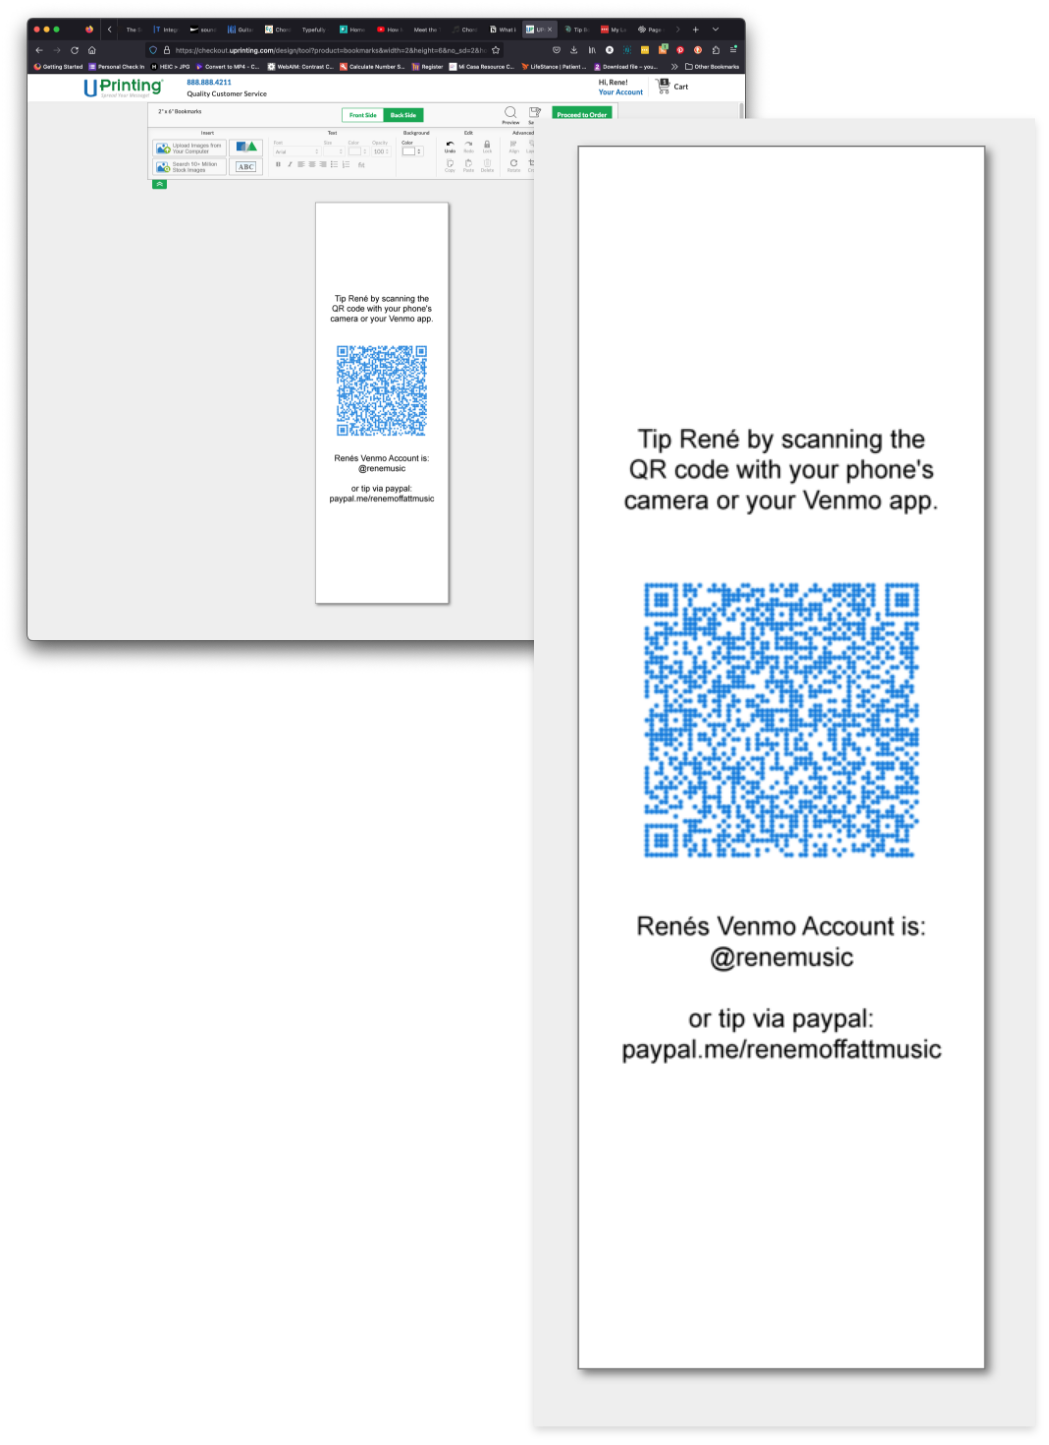
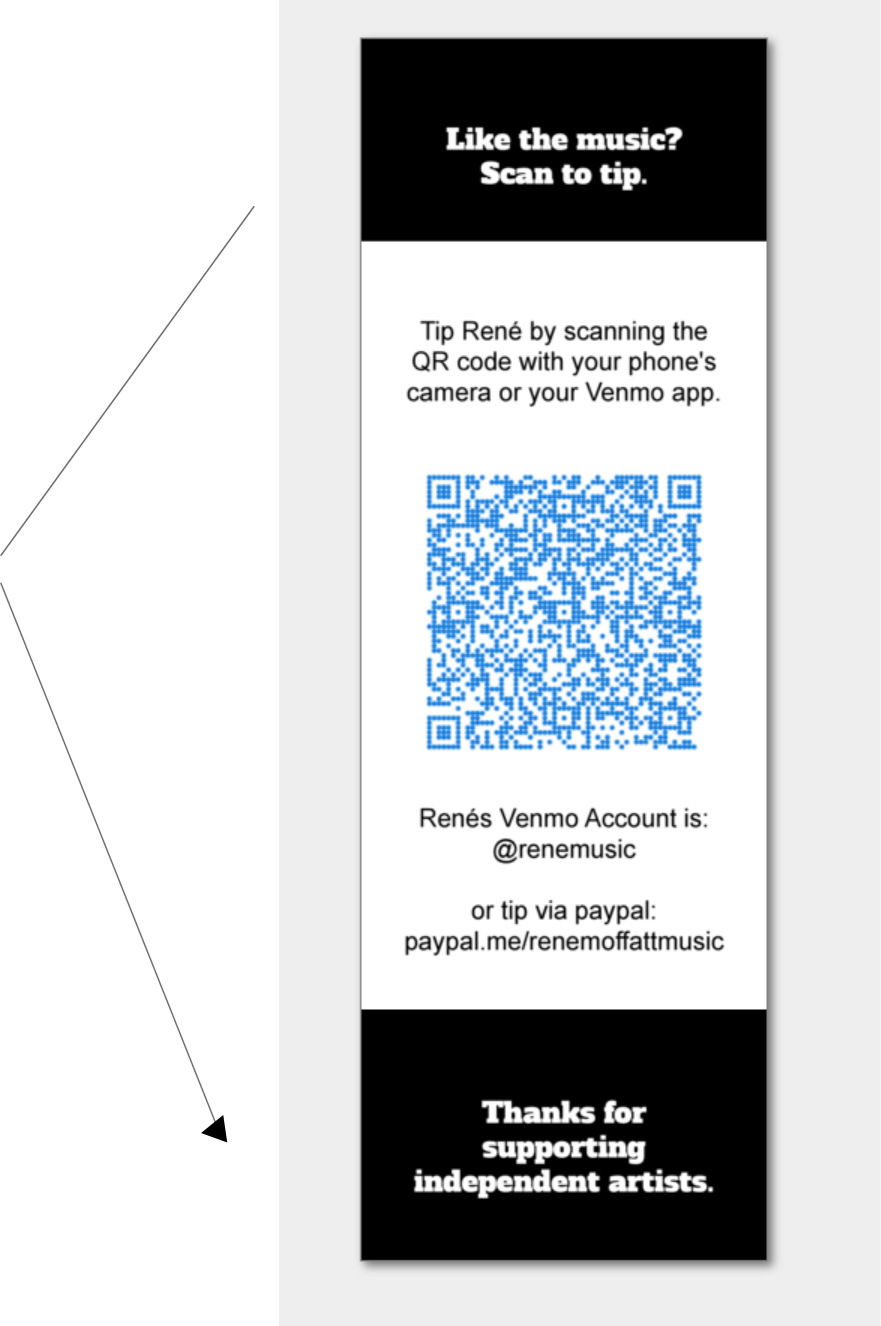
7. Add the tipping instructions
Add a short line of instruction, your Venmo handle in case the QR code is glitchy, and an optional alternative payment method.
I rarely receive PayPal payments through these bookmarks, and I’ve never had someone ask me for Apple Pay, Stripe, Zelle, or Cash App. In my experience, Venmo is the most common option for small tips.
You can also add a little more text to the top and bottom of the bookmark to encourage and thank patrons for tipping.
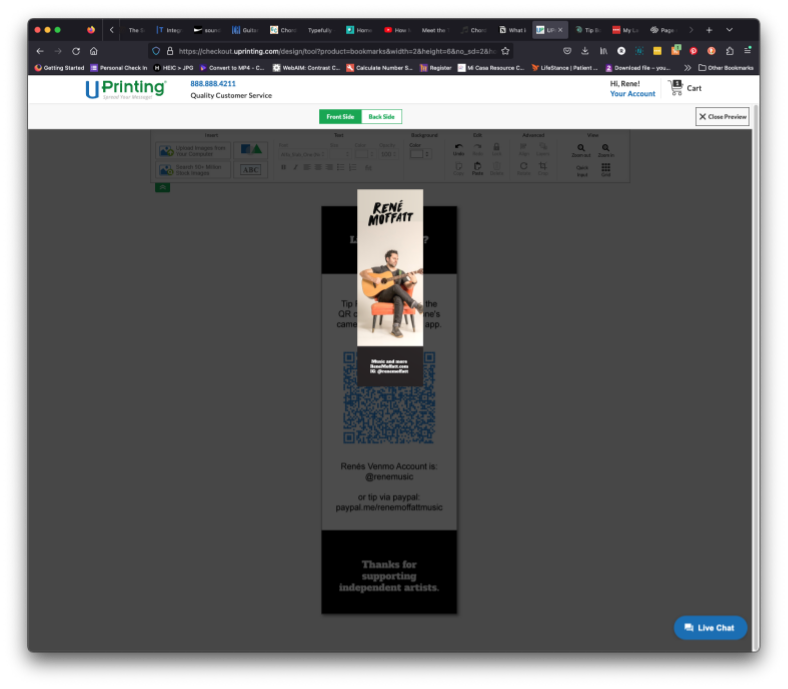
8. Preview and save your work
Use the preview control to inspect both sides of the finished bookmark.
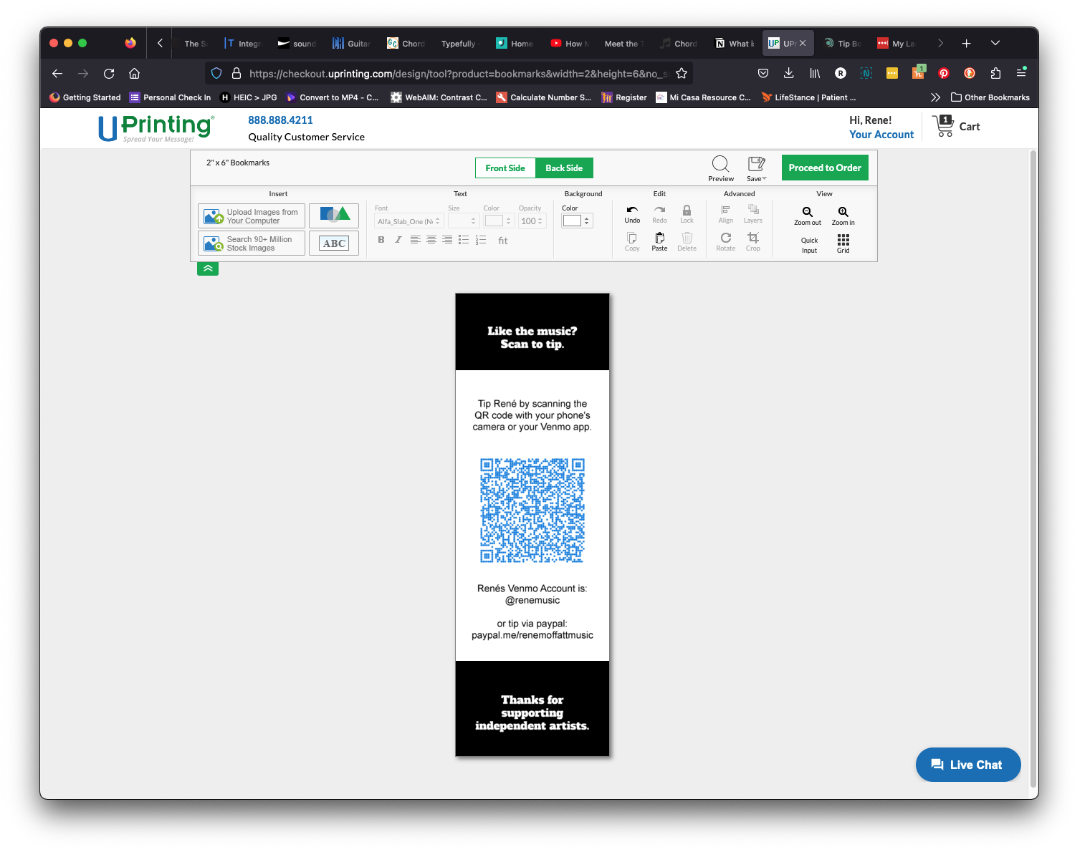
Save the project before you leave the editor. Saving lets you return to make changes and reuse the same design when it’s time to reorder.
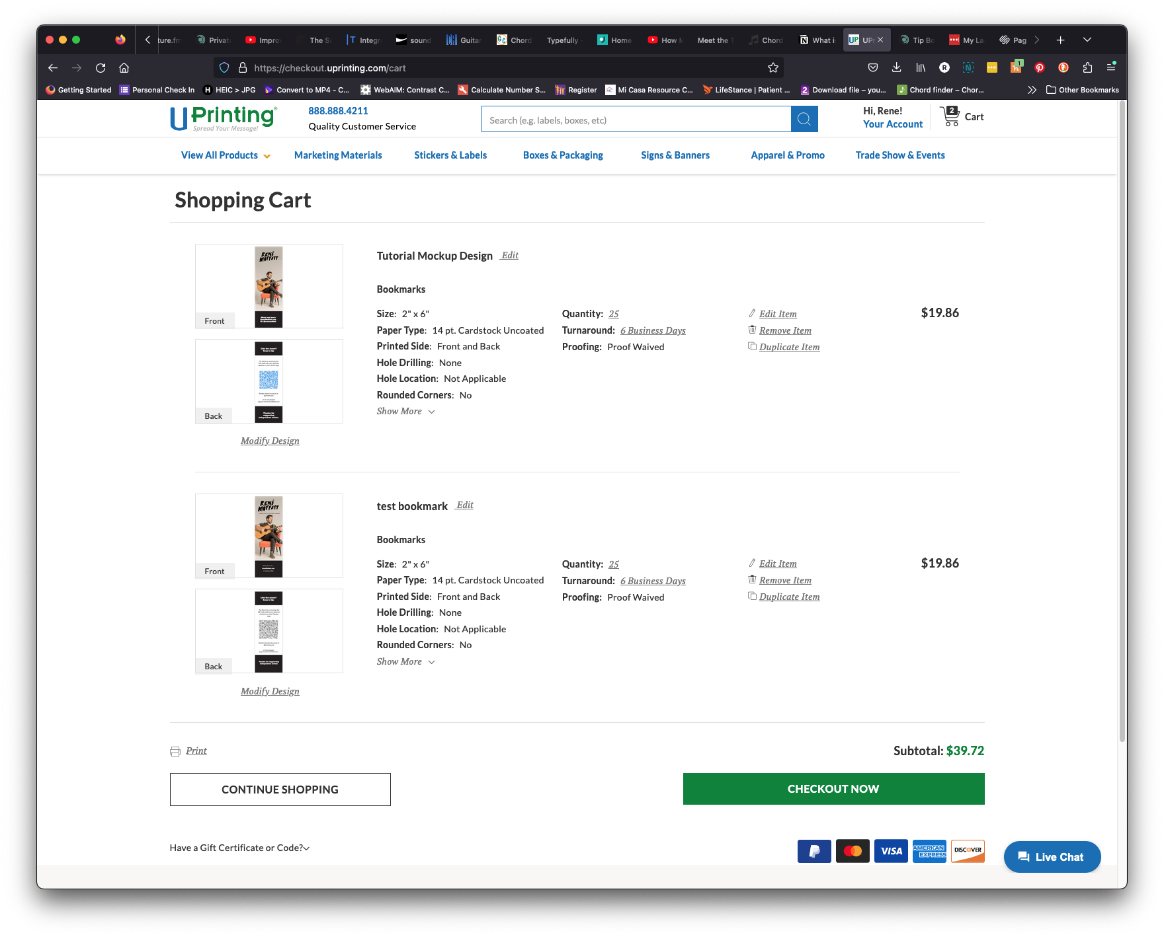
9. Place your order
Click “Proceed to Order.” You’ll arrive at the shopping-cart page, where the bookmark and its order details are listed. You can edit several options or return to the design if something needs to change. If everything looks good, click “Checkout Now” and place the order.
Using the bookmarks at gigs
Once the bookmarks arrive, keep them in your gig bag and place them on the tables and bar at your next show. They can increase tips, but they can also make it easier for patrons to engage with you after the set.
I put them out about 30 minutes before my set begins. It gives patrons a heads-up that music is about to start, and sometimes they stay to order another drink and listen.
I don’t hand them directly to people. I leave them on tables and the bar. It feels less intrusive, and people pick them up because they look polished.
I don’t typically ask the venue owner for permission because the bookmarks take up very little space and help advertise that the music is about to start. Use your judgment, and always gather the remaining bookmarks at the end so they don’t become litter.
Picking them up after the show creates natural opportunities to talk with patrons.
People will bend, fold, mangle, and spill things on them. That’s okay. Recycle the damaged ones and reuse the rest.
Happy gigging!
Was this helpful?
If this helped you make a little more money at your shows, you can send me a tip on Venmo at @renemusic.
Follow me:
Instagram: @renemoffatt
Facebook: @renemoffattmusic
TikTok: @renemoffattmusic
You can also find my music on Spotify, Apple Music, and Bandcamp.
René Moffatt is a Denver-based singer-songwriter serving up heavy pours of poignant lyrics and resonant melodies. Visit www.renemoffatt.com for music, videos, booking information, and more.
Thanks for reading René Moffatt Music! Subscribe for free to receive new posts and support my work.